Friday, February 4, 2011

A Midsummer's Night Fairy Party

The uber-talented author of Frog Prince Paperie linked her A Midsummer's Night Fairy Party for her mother on our LINK YOUR PARTY PAGE.  I love this party so much and it just goes to show that NOT every girly party has to be staged for a "little" girl.

We had a magical evening of celebrating my mother’s birthday…full of laughter, fairies, butterflies, and a mischievous little puck. But…there was a great sigh of relief as we cut into the birthday cake, the work was over and we could all simply enjoy the moment.
Throwing this event was extra fun; we travelled to Virginia to where my family lives to put it on. As a result, the whole family got to be involved. My brother helped with the cooking, my father engineered signs and candleholders and anything else that needed built, my mother remained silent as I dismantled and redecorated her house, and she, my sister-in-law and a few old good friends helped craft many of the small details in the party. And probably most important, my dear husband wrangled the children while we put the finishing touches on everything. It was wonderful to have an event that brought us all together!
A few weeks before the party, invitations were sent out. They have a full craft paper brown enclosure tied with the ribbons that were used throughout the party, and were adorned with little fairies and some specially written prose. The fairies were a special touch just for my mother — they are silhouettes of her little pixie of a granddaughter and are seen throughout the party decor as well!
midsummer's night night fairy party
. As our guests arrived, we wanted to set the stage a bit…
White branches in teal-tinted metal buckets hung heavy with votives flanked the path to the door. Votives were placed up the walkway, with little fairies dancing up the steps.
Inside, fairies and butterflies fluttered amongst the sweets on the dessert table. Natural elements such as burlap, river rocks and long branches tied the beautiful gardens outside the windows into the room.
The items served on the dessert and appetizer table were specifically chosen because they were Mom’s favorites, although I admit I have a few new ones now myself, like the AMAZING strawberry meringuesfrog prince paperie

midsummer night fairy party
The artisan strawberry meringues were so pretty, we had to convince people they weren’t just decorations. And they tasted even better than they looked! Sweet Purrfection, a small artisanal confectionery out of Chicago, provided these light as air melt in your mouth treats. Perfect flavor, perfect texture, perfect custom color….they were just perfect! We’ve since tried their other flavors, and they are ALL fabulous. Erin’s Cake Creations provided the beautiful custom decoration for the carrot cake and fondant roses that reflected the paper flowers in the party decor. Girly Gatherings made the unique sugar cookies with graphics to match the invitation, a crested “G” and our little fuscia fairy. The live greenery was all contributed by my mother’s gardens...
Each letter of the birthday banner is unique typographic art taken from antique books and available in the public domain. Masterpiece Designs has a wealth of inexpensive imagery and is where I found the beautiful antique frames. They were perfect for holding Shakespearean quotes!
My brother and I had such a good time in the kitchen together preparing the appetizers…apricot brie puffs, spinach and feta purses, herb crusted pork loin rolls, black bean cakes with spicy sweet potato sauce and cilantro cream, honey minted fruit and marinated cheese.
We mixed up a signature drink for the night – Love Potion No. 9, otherwise known as a white russian (mom’s favorite). We’re happy to report Puck’s potion only turned one of our guests into a lovable donkey.
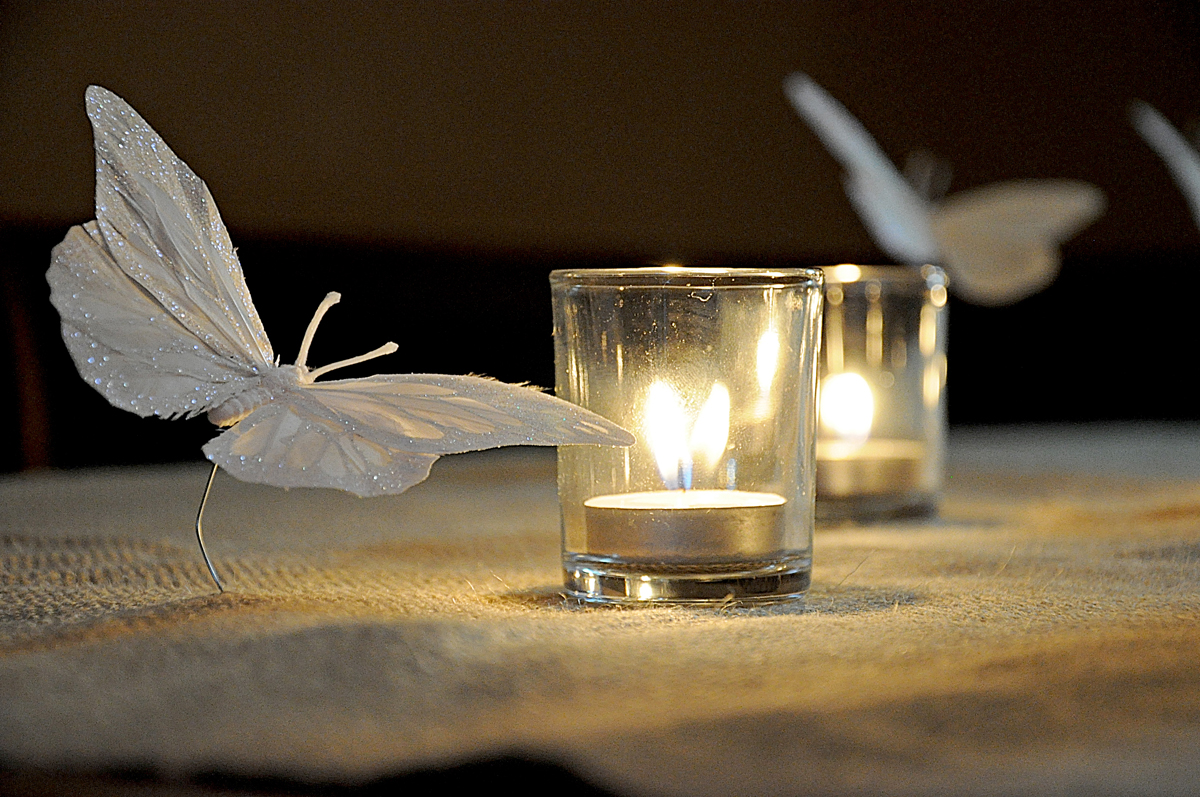
On the outside deck, fairy lights were strung on the arbors and trees for atmosphere, and there were many candles flickering out in the gardens to make for a little fairy magic. There was  liberal sprinkling of candles, votives and butterflies through the rooms inside where the party circulated. Fuscia paper lanterns and paper roses added pops of color.
A party can be thrown without a tissue pouf, but I don’t think I can ever give up the fun of the photo booth. The grandchildren, dressed as Puck and Titania, posed for the camera while the adults were able to play dress up for a moment.
As the guests left, we treated them to a few party favors. Again, one of mom’s favorites was selected to thank our guest for coming–chocolate covered oreos. There is a tutorial on how to make these little paper rose boxes here.
What we wanted to bring to our guests at mom’s birthday was a little feeling of magic, a little whimsy, and something the children attending the party would find some wonder in as well as the adults. The Midsummer’s Night Dream underlying theme and deeper color hues made using fairies for an adult party work, and made the party planning a little more fun.
Thank you to SandS Photography out of Hampton, Virginia for the party pictures.

(photo and content credit: Frog Prince Paperie)

Thursday, February 3, 2011

Princess Party ~ Royal Sweet Shoppe

Marie from Sweets Indeed Blog created this dessert station for her daughter. Be sure to look around her blog and visit her Etsy Shoppe for more DESSERT INSPIRATION!

The birthday girl was thrilled to see all of her favorite treats. Complete with madeleine cookies, mini hostess cupcakes, marshmallow puffs, Unicorn Candy Kabobs, and custom decorated cookies, this sweet station was calling her name. We centered the Dessert Station around a hand crafted/illustrated hanging princess and custom sweet shoppe sign. The backdrop and detailed elements such as these are part of our Sweets Indeed custom branding and the birthday girl gets to keep personalized items as a memento. We also incorporated damask pink fabric into our custom Table Tutu.
We love to create custom candy or dessert stations for kids parties. It’s important to bring in the personality and favorites of the birthday boy/girl and there is always a new spin that can be created for any theme.


(photo and content credit: Sweets Indeed Blog)

Wednesday, February 2, 2011

Tissue Paper Wreath Tutorial

Here is the GORGEOUS Tissue Paper Wreath Tutorial designed by Pluff Mudd Studio.
ENJOY!
This wreath can be made with any color or combination of tissue paper colors to coordinate with any party color palette, which makes it a perfect "go to" for any event!!!

Materials:
Foam wreath
Tissue Paper - cut into approx. 5 x 7 pieces (I used 3 packs)
Hot Glue
Skewer
Floral Wire
Ribbon (Bow)

Directions:
1. Cut a lot of 5x7 tissue paper pieces. I used three packs of tissue paper. (The small pieces that were left over after I cut the larger pieces were perfect for the outside and inside edges, so save those!!)
2. Pull the tissue paper in the center and twist into a point. There is one sample in the picture above. This takes some time, so turn on your favorite TV show to entertain you while you twist or include the kids.
3. Push the skewer through to make 2 holes at the top of the wreath. Pull through the floral wire to make a hanger on the back.
4. Heat up that hot glue gun. I used a wooden skewer to poke a hole in the foam wreath and squeezed some hot glue into the hole. (In the beginning, I thought I would poke a bunch of holes first. This did not work as well as I thought because each piece of tissue paper was a little different size after twisting. )
5. Use the skewer again to poke the tissue paper into the hole. This will save you from burning your fingers. :)
6. Continue poking holes, filling with glue, and pushing in the tissue paper until you have filled in the entire wreath.
7. Use the same process to fill in the center and outside of the foam wreath with the smaller left over pieces.
8. Finish off with a coordinating bow. I added one of my 3 inch party circles in the middle of the bow to include Cate's frog princess party theme.

VOILA!! A beautiful wreath!!


(photo and content credit: Pluff Mudd Studio)


Tuesday, February 1, 2011

Oreo Pops Recipe

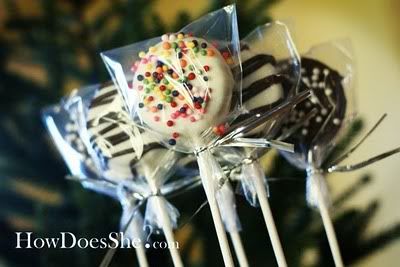
Here is the recipe for Pluff Mudd Studio Oreo Pops! YUMMY!

This is a great treat to add to your bag of tricks. Perfect for school parties, favors, dessert tables, treats for the neighbors, etc.

Ingredients and Materials:
Oreos (any flavor)
melting chocolate (It took me 2 bags for one package of cookies.)
sprinkles
cookie icing
wax paper
sucker sticks
small treat bags
ribbon
 
Here are the directions and few additional pointers!

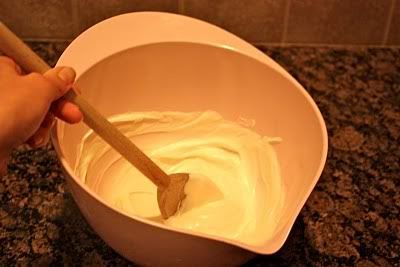
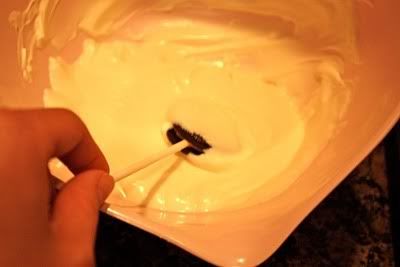
Melt the chocolate according to the directions on the package. I used chocolate made by Wilton and I thought I would be fancy and use my double boiler. However, it was much easier to melt the chocolate in the microwave. I also only bought one bag.. BIG mistake. Since this was my first try, I overheated the chocolate and it was too thick to dip the cookies. Be sure to have a bag or 2 on hand for mistakes. Once I figured it all out, I needed 2 bags for 1 package of Oreos. Next tip - Only melt a little to place the sticks. Then, go back and melt the majority of the chocolate when you are ready to dip the Oreo suckers.
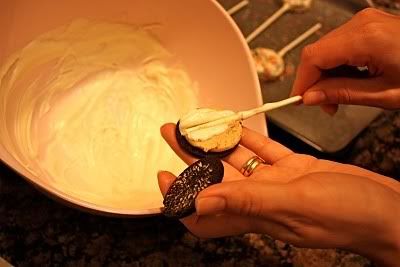
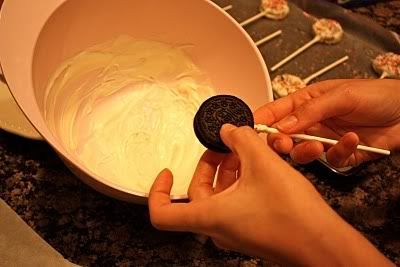
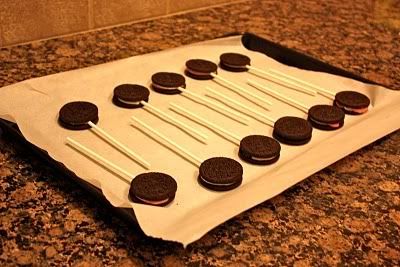
Separate the Oreos and line them on a tray. You do not want the chocolate to get cold, so having these divided helps a lot. At first, I had a hard time to get the stick to remain in the middle without breaking the cookie. Here is my trick - twist the stick with the hot melted chocolate into the Oreo cream and keep twisting. This will make a bed for the stick to lay in between the layers. I had 2 sizes of sucker sticks and the longer ones worked better for my project. If you are going to place them in a vase, container, etc. you want enough stick leftover to be visible.
Gently place the cookie on top the stick and place on the wax paper to cool.
I jumped the gun and started to dip these cookies too soon! I discovered that placing them in the refrigerator for a few hours made them nice and strong.
Dip the cookies in the yummy melted chocolate and place on a piece of wax paper.
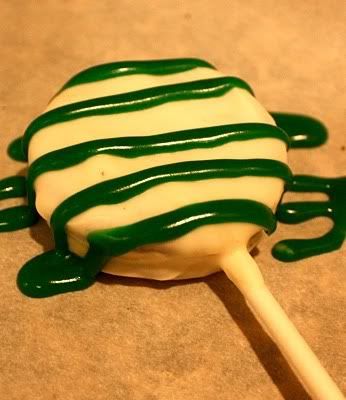
I used cookie icing to add the green stripes.
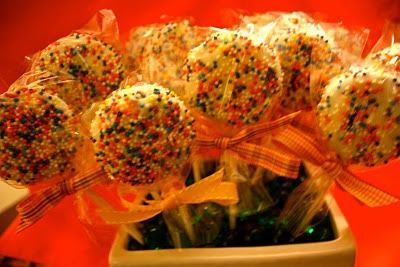
If you want to add sprinkles, be sure to do it when the chocolate is still hot.
After the suckers have cooled, package them in small clear treat bags and seal with a ribbon. I used a white flower pot and added floral foam. I covered the top with glass beads and pushed the suckers into the foam. Voila - Oreo Cookie Pops.

(photo and content credit: Pluff Mudd Studio)

Related Posts Plugin for WordPress, Blogger...